Teaching writing strategies with graphic organizers.
Graphic organizers are so important. They are a great visual for students to use before they dive in and write. It helps to collect their thoughts and give meaningful content once it’s time to write. Here are 3 ways you can use graphic organizers for writing to keep your students on their toes till the final days of school.
1. Use graphic organizers to help with their thoughts
By the middle of the year, we have covered a good amount of sight words that can be used in our sentences. We last left off at simple sentences (I am Sarah.) and labeling pictures according to prompts. I then usually add another sentence to something that we can do. For example, I give the class the prompt: “What is something that you can do at recess?”
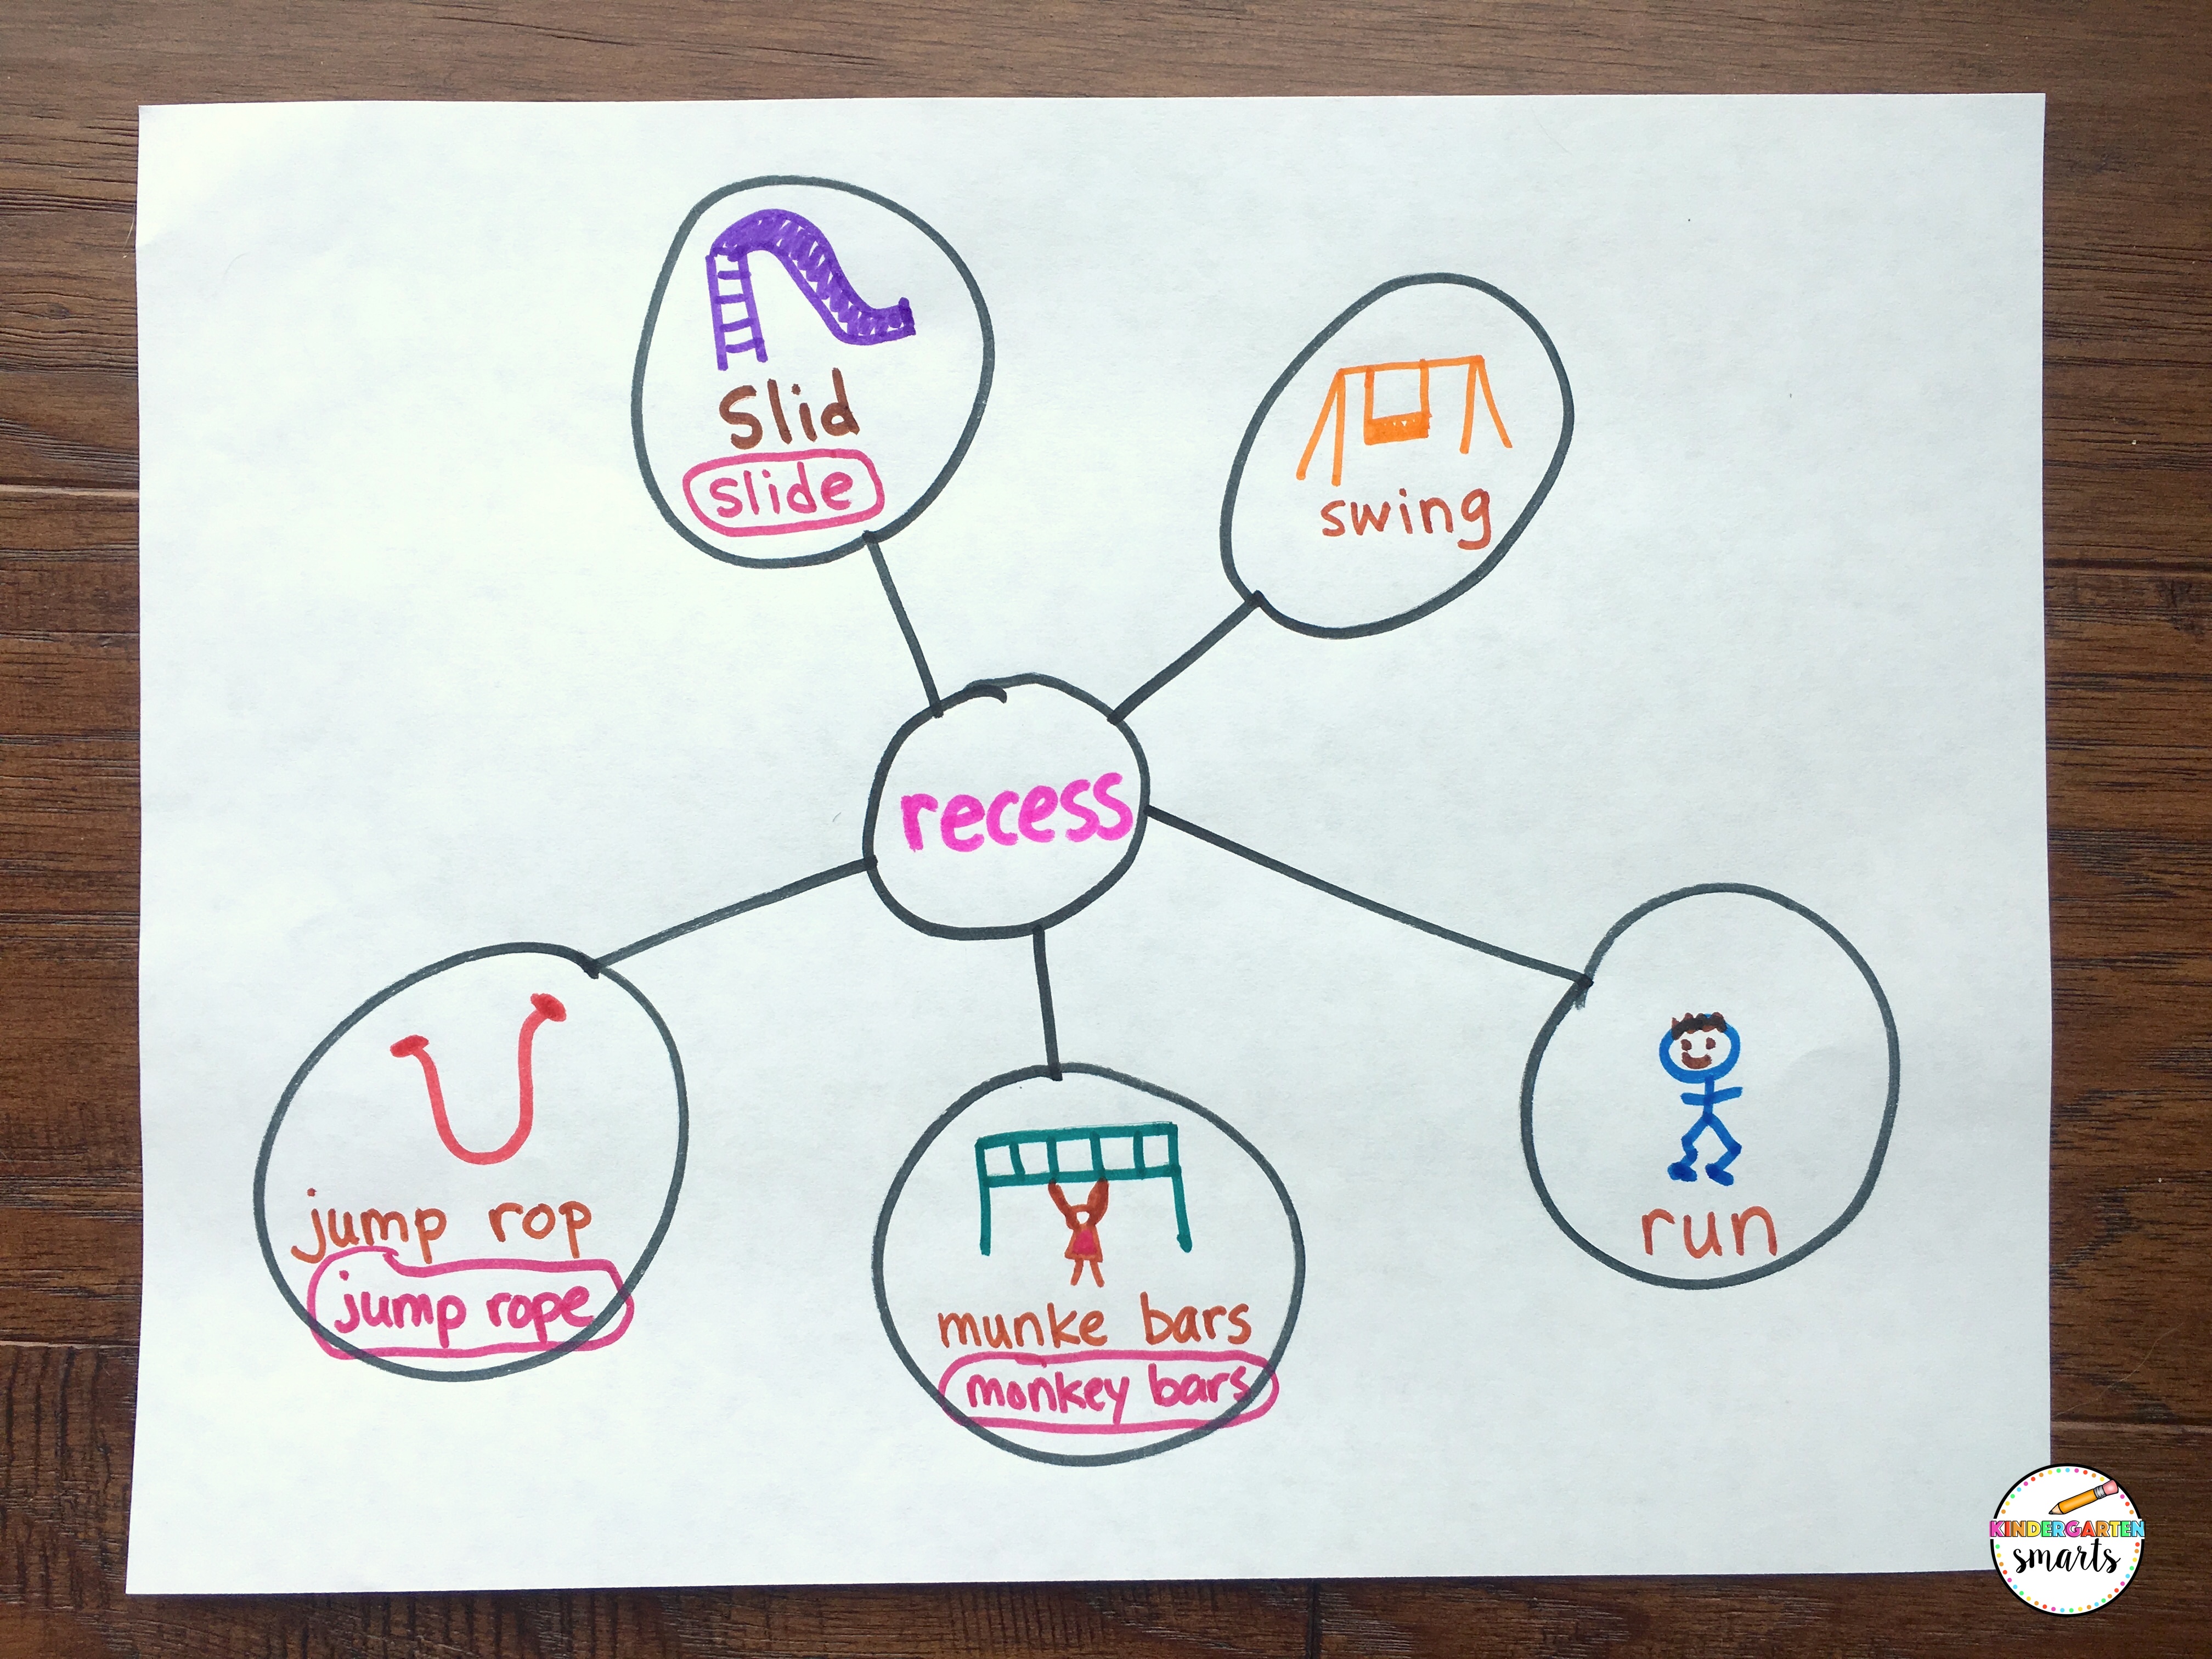
How to use a bubble map:
- I start by making a bubble map with recess in the middle. With the student’s help, we come up with ideas of things we can do at recess. Keep in mind we are also working on sounding out unknown words. So together we will sound out words such as: slide, run, play, swing, skip, etc. I will model how I hear the word phonetically and write it down in one color on the bubble map and then in a different color, I will write the correct spelling underneath. Again, it’s good for students to see the sounding out process, but at the same time, they need to see a word written correctly. I may even draw a little picture next to the word of a slide or a swing just so they can get the full visual of what we are writing.
- After we have enough ideas for things we can do at recess, now it’s time to take that information in our bubble map and write a sentence (or two!).
- I model for them my first sentence, I am Sarah. Then I explain I am going to make a second sentence about something I can do at recess. I refer back to my bubble map and pick one. I then count on my fingers the number of words in the sentence: I can swing. I have the students count too. We talk about how my sentence will have 3 words in it. I model how after my period in my previous sentence (I am Sarah.) I need to make a new finger space to start the next sentence. We then go through the hand signals of a capital letter (hands clap above head… and so on). After completing my sentence we always end in a stomp to signify the period. I like to model doing at least one more thing I can do at recess with this same process. This way students who are ready for multiple sentences can do so, but those who are not can see how it’s done again.
- I then go over how I’m going to illustrate my picture. I talk it out with them. “Would I draw a picture of me inside the classroom? Would I be at my house? Things that are obviously wrong are funny to them and make them realize that their picture needs to match the words in their writing.
- After I have modeled my writing, I have them think about something that they can do at recess for a moment. Then I have them turn to their partners and they share their sentence. I then call on students to share out loud what they do at recess.
- Then I send them to their seats to begin writing on their own. I pull 1-2 small groups during this independent practice time and have the others work on their own. During this time I like to leave up the circle map that we made as a class so they can go and refer to that if needed. I also leave my own example up on my document camera so they can remember exactly what they are supposed to do. Some may copy exactly what you have, and for now, that’s ok. I know eventually, they will come up with their own ideas. Also, I make sure when I pull students into a small group that we come up with our own ideas as well.
2. Student’s begin to make their own graphic organizers
After a month or so of teacher-led graphic organizers for writing (I mainly use the bubble map or circle map), now it’s time for the students to make up their own organizers. It’s very important for students to collect their thoughts before diving into their writing. This goes all the way from kindergarten to the upper elementary into middle school and even high school! It’s such a good technique, and I like to get them started early. To solidify this process you need to do this together for a long time during a whole group lesson.
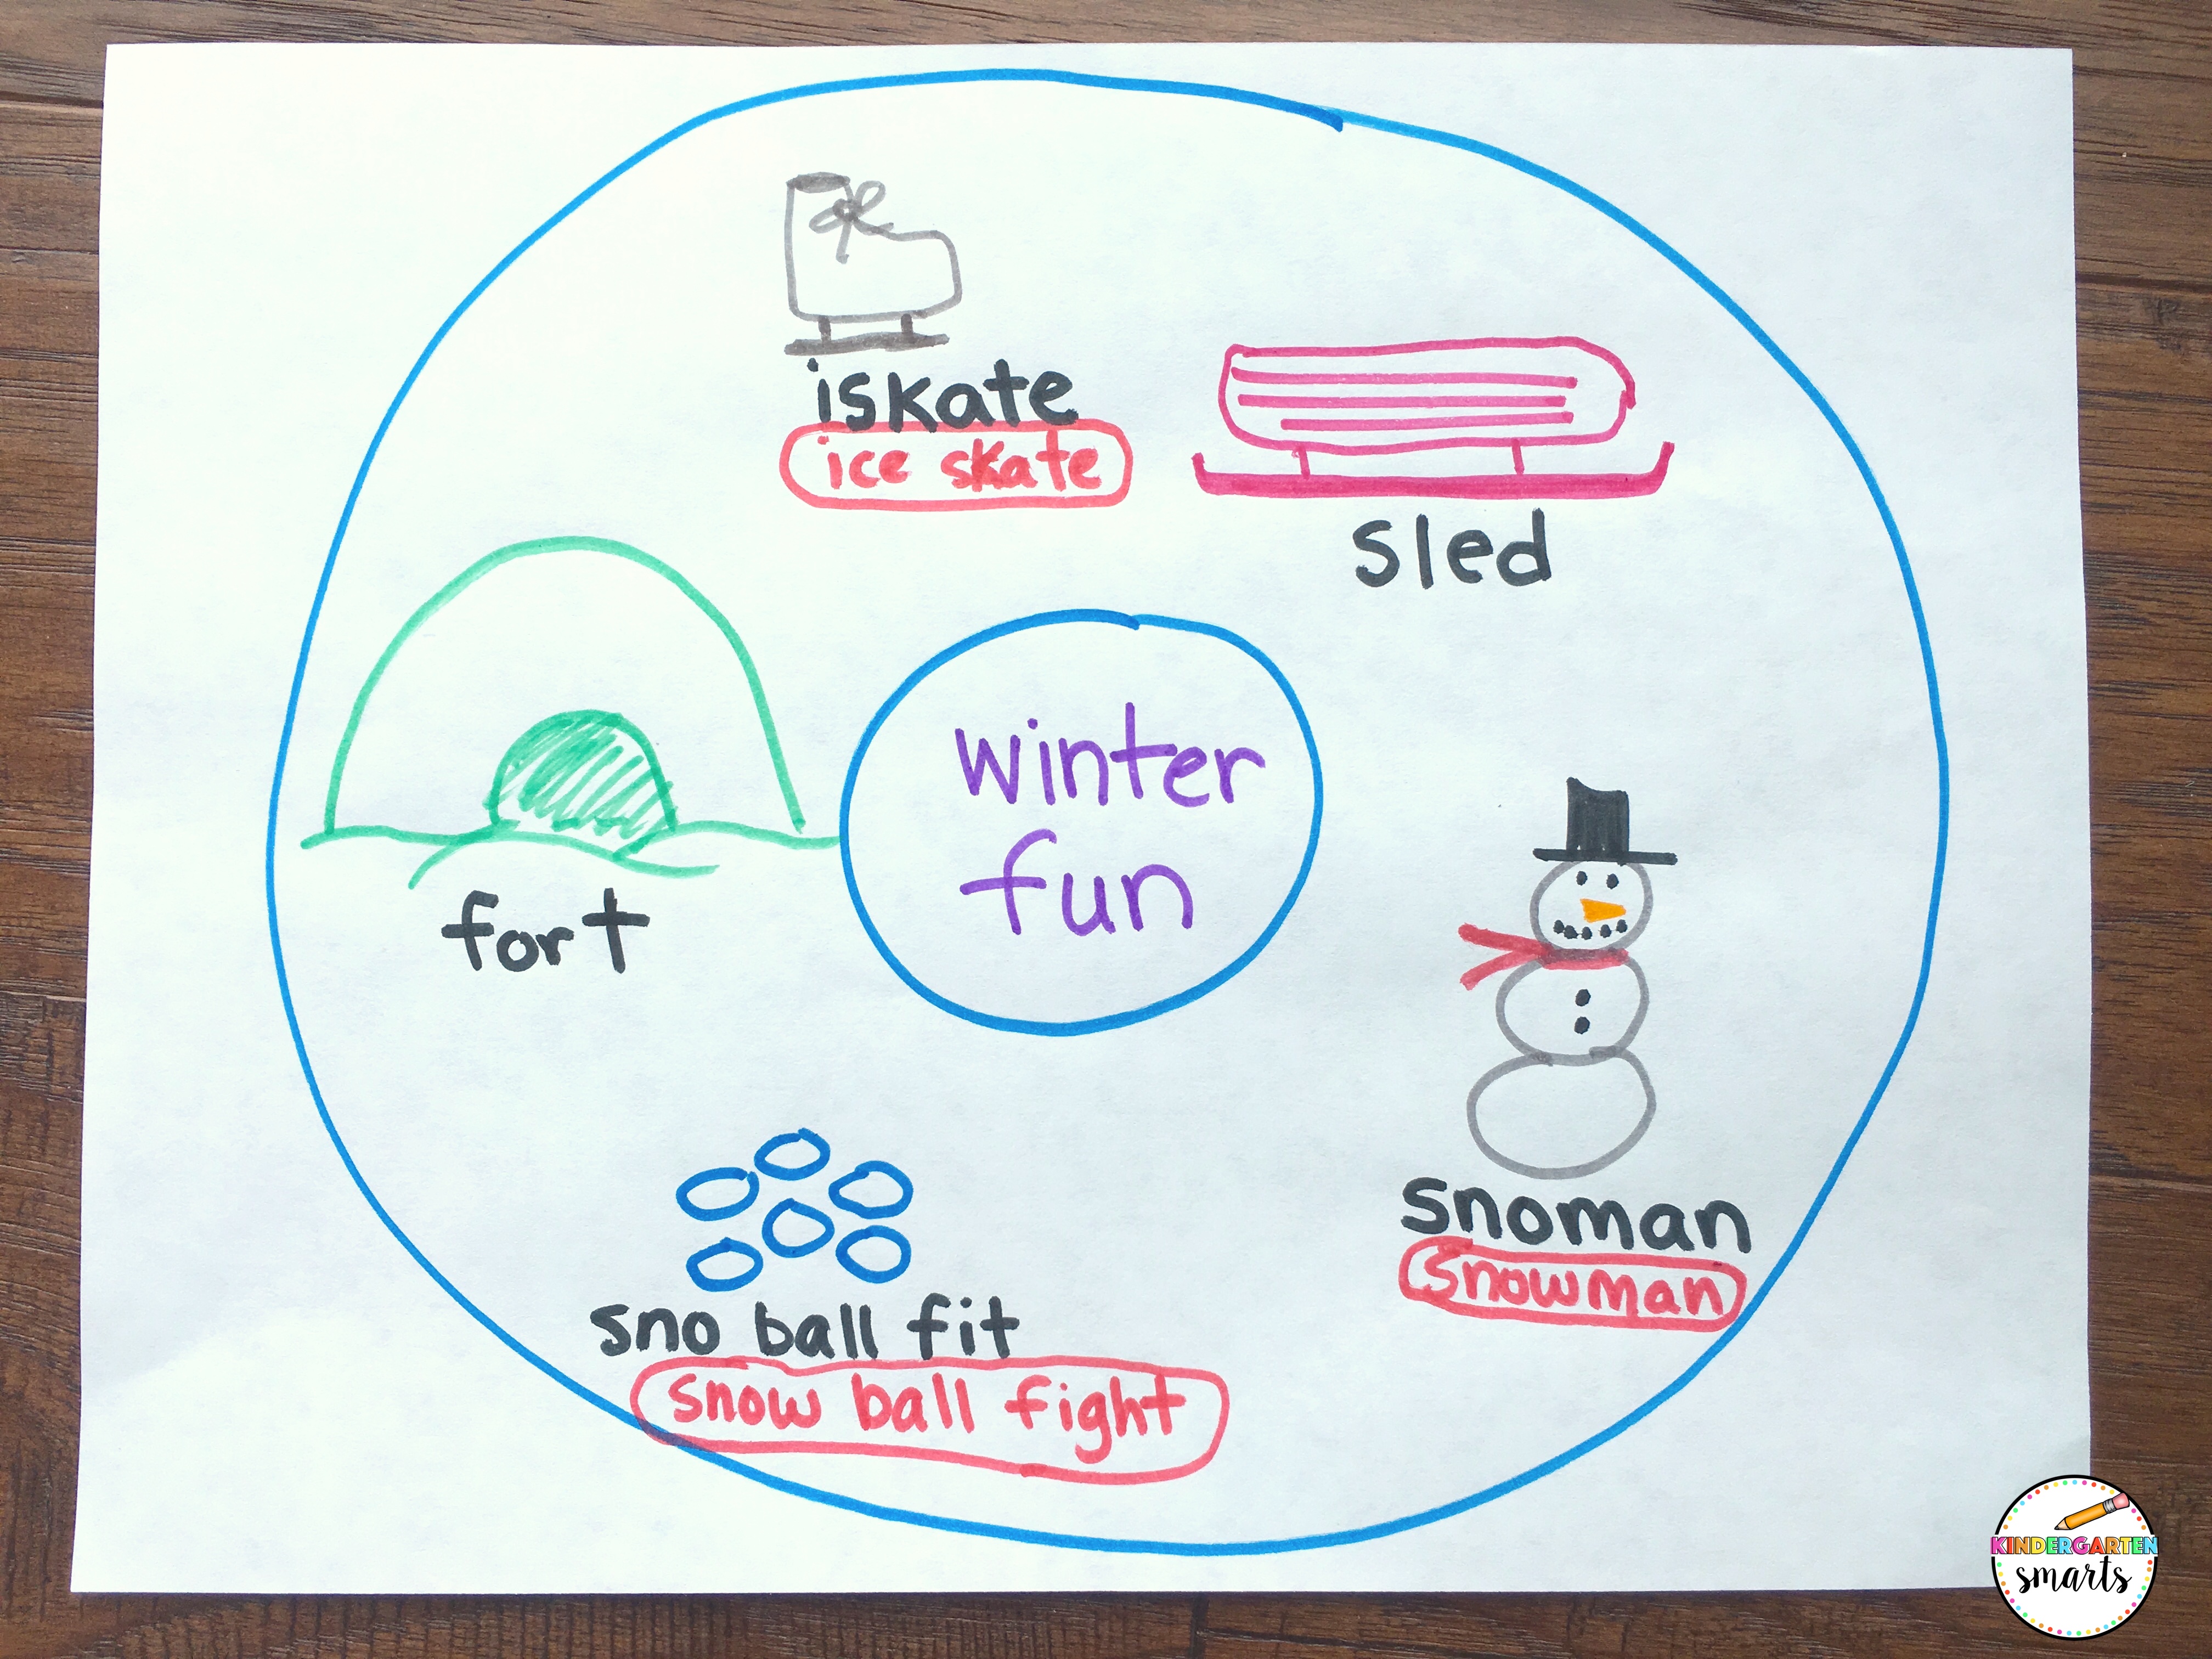
For a lesson to a prompt such as: What are some activities you like to do outside during the winter?, here are the steps I take:
- Pass out a pre-made graphic organizer to every student. Click here to grab 3 FREE graphic organizers! (Later in the year you can have them make their own on a blank sheet of paper.) Whether you plan to teach this lesson sitting on the carpet or at their tables that’s up to you. Just make sure they have something hard to write on. For this example, I will use a circle map.
- We talk about the prompt and what should we put in the middle of the circle. Would we put the things we do in the summer? Our favorite food? NO! We decide to write in the middle, winter fun.
- Together as a class, we come up with things that we like to do. I also have my own circle map displayed as we are doing this together. You can model the first word such as snowman and write it how it sounds phonetically and then write the correct spelling underneath. Then give students a moment to sound out their own words and go over the correct spelling when you write it on your circle map.
- This may take up the entire time and maybe you stop here for the day and collect the circle maps to have for tomorrow. If you still have time, then start to model how you take an idea from your circle map and put it onto paper.
- Students will then have time to use their own circle maps at their seats and use it to write sentences. I like to use basic sentences such as, “I like to sled. I can make a snowman. I have a snowball fight.” These sentences are familiar to them from our sight words that we have covered. (As well as our sentences we practice during our reading block.)
3. Introducing the tree map.
A tree map is a great way to organize their thoughts. It gives them the visual of how many sentences you would like to see in their writing. I always encourage students to write at least 3-5 sentences by this time of the school year (I’m talking right after spring break time frame.)
Here is how I use the tree map:
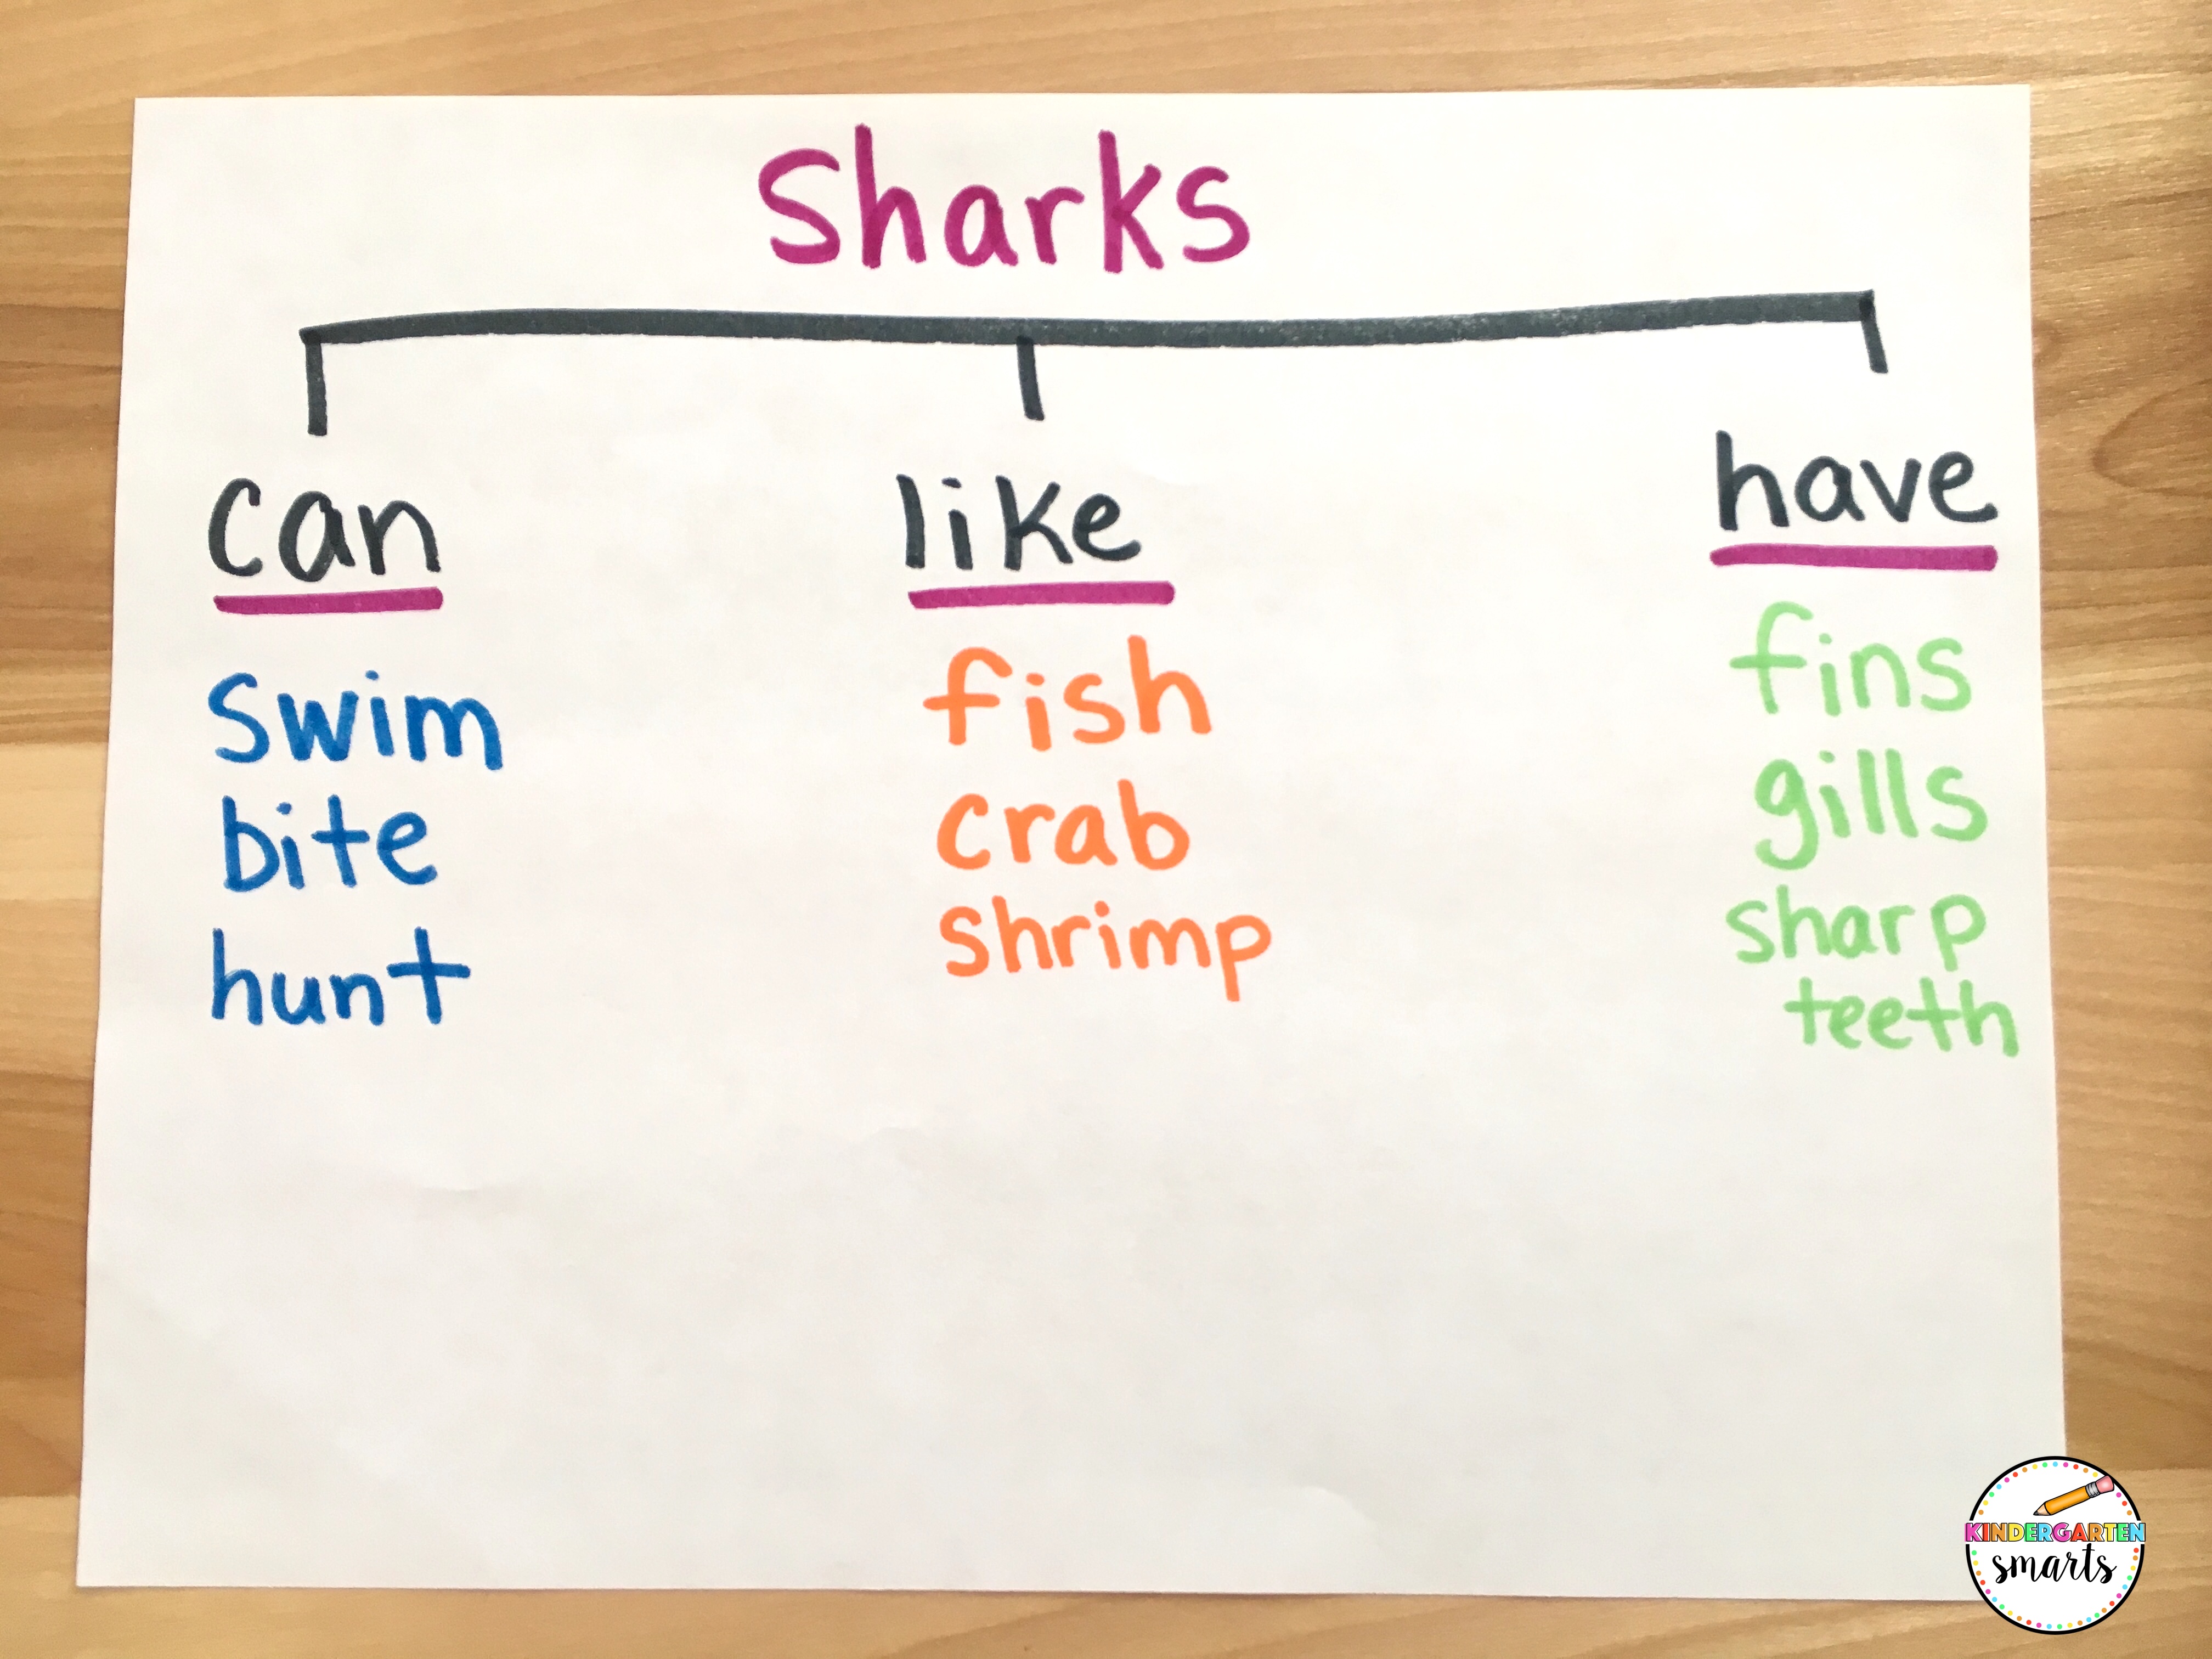
- I start by the topic at the top. If we were writing about sharks I would place that as my title.
- Then I would make 3 branches underneath of ‘can’, ‘like’, ‘have’. This allows us to think about things sharks can do, what they like (such as food or what do they like to do), and what do they have (physical features).
- After we have read our book and have made our circle map of things we have learned, we can take this information and put it on our tree map. This makes our writing so much more organized when it’s time to start.
- I look for things that sharks can do from our circle map. I see things such as swim, dive, bite. I show them how I will put those words on my tree map under ‘can’.
- Then I look for things that they like. I find things such as fish, crab, to hunt. I then put that under ‘like’ on my tree map.
- Last we talk about things that they have. I find things such as fins, gills, smooth skin… I put that under ‘have’ on my tree map.
- IMPORTANT! When I am first introducing this, I do not put that many words down. I usually just pick 1 from each branch. So under ‘can’ I would put swim, under ‘like’ I would put fish, and ‘have’ I would put fins. You need to keep it very simple at first, but eventually, you could add 2 and maybe even 3 things under each branch! Another idea is to put all of the traits on the tree map and circle just 1 trait from each category that you want to write about.
- Now it’s simple, you just plug away your sentences using this scaffolding that you just created.
Sharks can swim. Sharks like to eat fish. Sharks have fins.
4. Grab this free tree map
These are very basic sentences, but you are teaching them how to take information from a book, organize their thoughts logically, and then put it to paper! It’s a lot of steps for these little minds, but it does work! I highly encourage you to give them a blank tree map and fill it out together so they just aren’t copying yours from the board when they go to write independently. You can download this tree map and the other graphic organizers for free here and use it during your whole group lesson. Have the students work with you as you are all filling it out together. Then they can take their own tree map back to their seats and refer to it.
5. In Conclusion
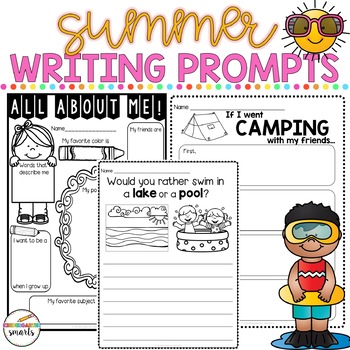
These writing strategies for the end of the school year do work, and it’s so much fun to see your students get excited about researching new topics to write about. If you are looking for some end of the year writing prompts for those “I’m out of ideas” days, please check out my Summer Writing Prompts in my TpT store. They are also great to send home for the summer so your students have some practice and don’t experience that “summer slide”.
Happy Teaching!!
Need more writing strategies? Click on the images below to direct you my other blog posts.
Join the newsletter
Sign up for exclusive freebies and teaching tips here!





Leave a Reply